Are you seeking a way to quickly receive feedback on your WordPress articles? By highlighting any potential areas for development for your WordPress articles, feedback can help increase content quality. Additionally, it can support the development of trust, which will improve website engagement.
This tutorial will demonstrate how you may quickly and easily receive feedback on your WordPress articles.
Why Request Quick Comments on Your WordPress Pages And Posts?
The majority of WordPress websites encourage visitors to write comments and give feedback on articles and blog posts.
However, many people refrain from doing this out of fear of being judged, a lack of time, or a preference for using social media. Additionally, some readers could be perplexed when it comes to commenting.
You may make it simple for users to rate how beneficial your content was to them by using “was this helpful” WordPress plugins.
At the conclusion of your WordPress article or page, these plugins typically provide a thumbs-up/thumbs-down or a Yes/No button that readers may use to rate your material.
You can even make a fast survey using WordPress survey plugins so that visitors can give feedback.
This increases user interaction with your WordPress site and demonstrates to the user how much you respect their opinion. Additionally, it demonstrates your active efforts to enhance user experience as website owner.
By lowering bounce rates. users are more inclined to stay on a website with interesting content—feedback plugins can also help your website’s SEO results.
After that, let’s look at how you can quickly and easily receive feedback for your WordPress posts.
Quickly Add Feedback Using a Plugin
This technique is for you if you’re seeking for a simple way to add some quick feedback to your WordPress posts and pages.
Installing and activating the Was This Helpful WordPress plugin is the first step. Please refer to our tutorial on installing a WordPress plugin for further information.
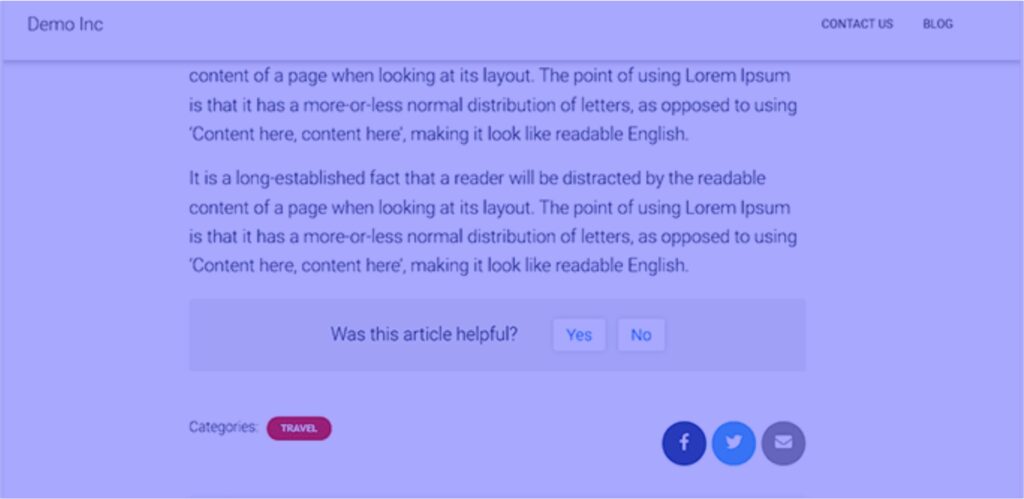
The plugin will immediately begin functioning after activation and add a “Yes” and “No” option next to the “Was this article helpful?” question at the conclusion of your articles and pages.
These buttons make it simple for website visitors to rate your content.
You must access the content > All Posts page from the WordPress admin sidebar to see the feedback on your content.
The ‘Helpful’ column will now be added to the right side of the screen once you get there.
You can check the ratings for your material from here and see how many people have selected the Yes or No option for each of your postings.

Use UserFeedback to Add a Survey for Quick Feedback
This approach is appropriate for you if you want to quickly get feedback by adding a survey to your sites and posts.
Installing and turning on the user feedback plugin is the first step. You might want to check out our article on how to install a WordPress plugin for additional details.
You can get a free version of the UserFeedback plugin as well. To access extra features, we will use the Pro version in this lesson.
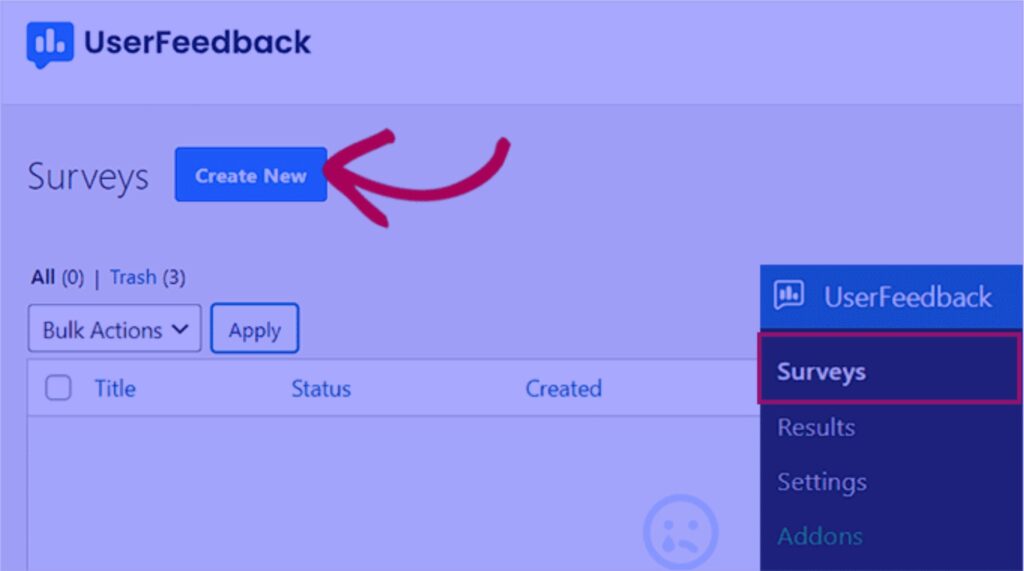
After activation, go to the UserFeedback » Surveys page from the WordPress admin sidebar and select the ‘Create New’ button.
You will then be sent to the ‘Select a Template’ page.
From this point, you can utilize any of the pre-made survey templates, such as restaurant menu surveys, eCommerce store surveys, phone lead forms, post-purchase reviews, and more, as surveys on your website. Additionally, you can “Start From Scratch” and create your own survey.
We will be utilizing the Content Engagement template for this tutorial since we want to quickly add a feedback form to our website asking visitors how we can improve our content.

Simply select the survey template. You will be taken to a new page where you can begin building your survey after clicking this.
Users are automatically presented with a question asking if they found the content interesting when using the Content Engagement template.
However, you may quickly alter this by entering a different question in the “Question Title” area, such as “Did you like this article?”

Following that, you must select a user answer mode from the ‘Question Type’ dropdown option.
For instance, you can select the “Star-Rating” option if you want readers to rate your post out of five stars.
Additionally, as modalities of answers, you can show checkboxes, radio buttons, email capture choices, single text fields, lengthy responses, and Net Promoter Scores.
If you select a radio button or checkbox, you will need to enter the survey question’s many possible replies under the ‘Possible replies’ option.

The next question, which is already included in the material Engagement template, asks users what kind of material they would want to see developed. After that, scroll down to that question.
You can alter that query to get comments from readers on the content they just read. By doing this, readers will first have the chance to score your material before they can offer any comments on it.
To allow people to quickly submit descriptive comments on your website, be sure to select the ‘Long Answer’ option from the ‘Question Type’ dropdown menu for this question.

Once you’ve finished, all you need to do to customize the survey widget is click the ‘Preview’ button at the top. You can choose the background, text, and button colours from this point.
When finished, you must press the ‘Next Step: Settings’ button to continue.

With the ‘Settings’ tab now open, scroll down to the ‘Targeting’ section to get started. From this point, you can choose between desktop, mobile, and tablet as the platforms on which the survey will be displayed.
The next step is to select the pages on which the survey will appear. The brief feedback poll will appear on all posts and pages of your website if you choose the “All Pages” option.

The ‘Advanced’ option, on the other hand, might be chosen if you only wish to restrict the survey to a few pages.
Following that, you must choose the survey display conditions from a selection menu.
For instance, you can choose the ‘Post type is’ option from the dropdown menu on the left if you only want the survey to appear on posts. Choose ‘Post’ from the dropdown menu on the right after that.
Your brief feedback survey will no longer be visible elsewhere other than WordPress posts.

Next, navigate to the section marked “Behavior.” Here, you may set the duration and time of your survey’s display.
By choosing the month and day you want the survey to end, you can even set a runtime for it.
Simply click the ‘Next Step: Notifications’ button after you are finished to continue.

The ‘Send Email’ switch can be turned on in the first place on the following screen if you want to be notified through email whenever a user leaves feedback on your website.
You must then select “Next Step: Publish” and provide the email address at which you wish to receive notifications.

Simply scroll down to the ‘Publish’ portion of the new screen and change the ‘Survey Status’ to ‘Publish.
By switching the “Schedule for Later” button to active and entering a publication date and time, you may also choose to schedule your survey at a later time.

To save your changes, finally press the “Save and Schedule” or “Save and Publish” button.
You may now go to your website to see how the quick feedback survey works.

You may view the survey’s findings after it has been published by going to the UserFeedback » findings page from the admin sidebar.
You can check the number of responses, impressions, and reactions offered by your visitors from this point.
You can use this to enhance your WordPress website’s overall content.

We sincerely hope that this post has shown you how to quickly receive feedback on your WordPress articles.
Also Read: How to Display Facebook Page Reviews on a WordPress Website
Also Read: 10 Things You Must Do Before Changing WordPress Themes
Also Read: How to Integrate Web Push Notifications Into your WordPress Website
Also Read: 10 Website Marketing Metrics Every WordPress Site Must Track