Do you want to learn how to install Google Analytics in WordPress?
For your website to be effective, you must understand how your audience uses it. The most effective way to understand your audience is through traffic statistics, which Google Analytics offers for FREE.
In this post, we’ll explain the significance of Google Analytics and show you how to install google analytics in WordPress (step by step).
Firstly, we will go through the purpose of Google Analytics and how it may help you expand your website.
After that, we’ll walk you through the step-by-step process of opening a Google Analytics account and various installation options for your WordPress website.
Finally, we will go over how to get your Google Analytics traffic reports.
Why do Bloggers need Google Analytics?
Your first priority when starting a blog is to increase traffic and subscriber numbers. By providing you with relevant statistics, Google Analytics assists you in making decisions based on data. You’ll observe:
Who browses your website?
This aspect of analytics provides information on your audience’s location, the browser they used to access your website, and other crucial details like language, screen resolution, JavaScript and Flash capability, and more.
This insight is really helpful and can be used in a variety of ways. You can use the user data to inform your custom website design and ensure that your target audience will be comfortable with it.
You should refrain from including a flash component on your website if the majority of your users don’t have Flash support. Make sure your design is compatible with that resolution or smaller if the majority of your users are using screens with a 1280 x 720 resolution.
Also Read: Easy Guide on How to Secure Your WordPress Website
What do visitors to your website do there?
You can monitor the user’s journey across your website, their time spent there, and the bounce rate (the percentage of users who left your site on their first visit).
You may use this data to lower your bounce rate and raise your page views.
Also, you can see which of your posts are the most read, which ones are performing poorly, and what kinds of information your users prefer.
When do users access your website?
You can choose the ideal time to publish your post by looking at the busiest times of day for your website. You can plan your post to meet at that time even if that time zone is inconvenient for you.
How do people come across your website?
You can see in this aspect of the analytics where the users came from. Do they utilize search engines, direct links, or links from other websites as referrals, for example.
Also, it displays the percentage of visitors that originated from each of these sources. You can see a detail of each of these groups in Google Analytics. If so, it will display the search engine that fetched you the most visitors, such as Google, Yahoo, Bing, etc.
The distribution of referral sources reveals which websites you should interact with most. If Quora is your main source of referrals, you must offer Quora-only content that makes your Quora audience feel special.
You might want to think about forming a partnership with that website if it serves as your top referral source (guest post exchange or something else).
How do users engage with your content?
Google Analytics displays how visitors engage with the content on your website. It displays a lot of information, such as the percentage of users who clicked on each link on your website.
To find out what would help you achieve your objectives the most effectively, you may run A/B split testing by setting up content experiments in Google Analytics.
You may adapt your material to your users by looking at user interaction. You can concentrate on the methods that work for your site and avoid strategies that don’t by looking at the responses to the aforementioned questions.
In other words, stop guessing and concentrate on the numbers that really matter so you can make data-driven decisions.
Also Read: WordPress Security Plugins
How to get started with Google Analytics
All you need to sign up for Google Analytics is a Google or Gmail account. To sign up, just follow the easy steps listed below to create your Google Analytics account.
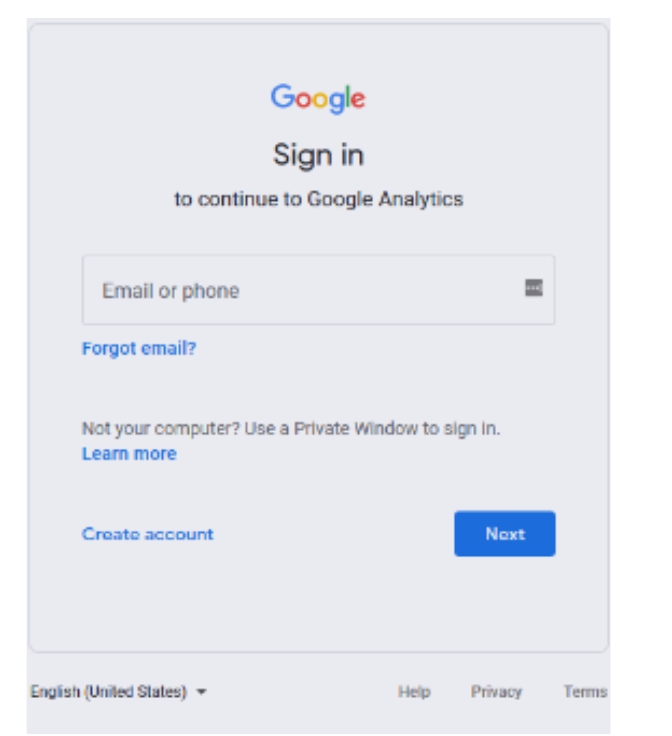
Step 1: Go to the Google Analytics website and sign up first. Simply click the “Get started today” option once you are on the website.

The next step is to log in using your Google account. You can sign in using your Google or Gmail account if you already have one. You can still go ahead and set up a Google account for yourself if you choose.
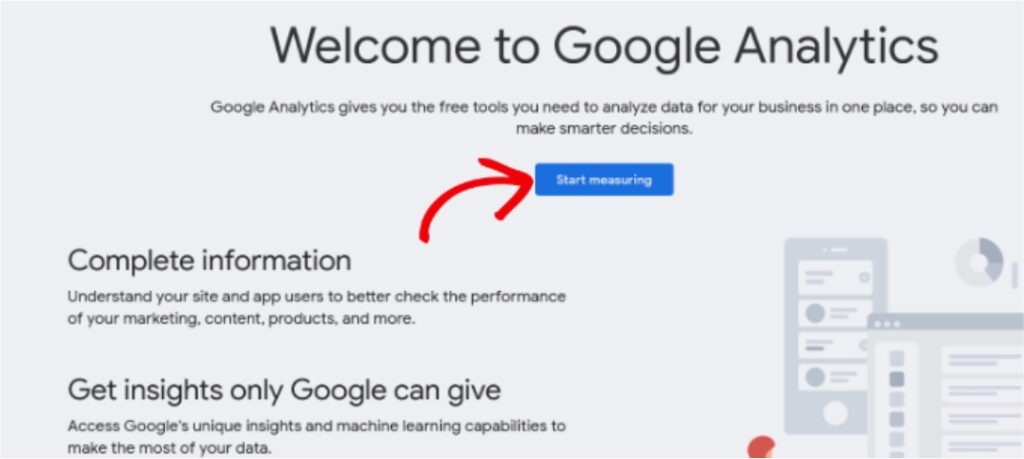
Step 2: A welcome screen identical to the one below will appear once you sign in using your Gmail account.
You can use your Gmail account to join up for Google Analytics here. Click the “Start measuring” button now.
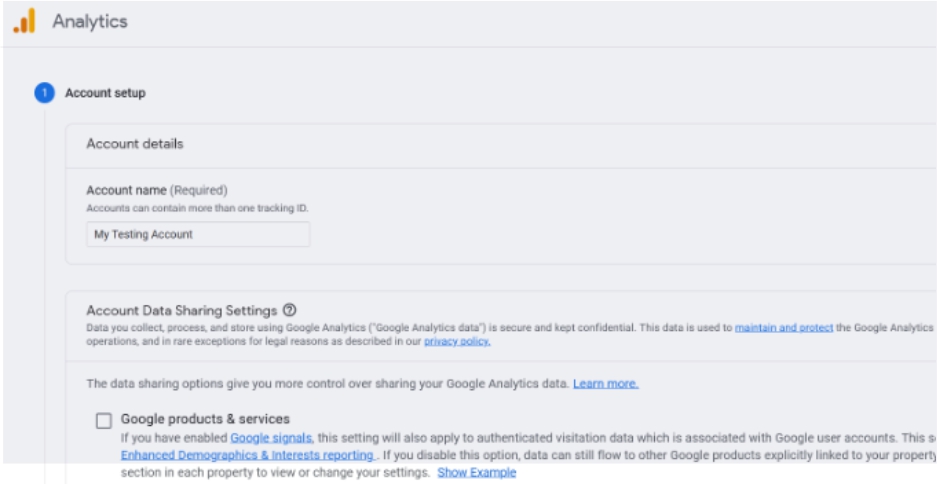
You will then be prompted for an account name. You can choose anything related to your company name since this name will only be used internally.
Google Analytics will also display choices for data sharing across many accounts. You have control over sharing your Google Analytics data thanks to these settings. You can proceed to the following step while maintaining the default settings.
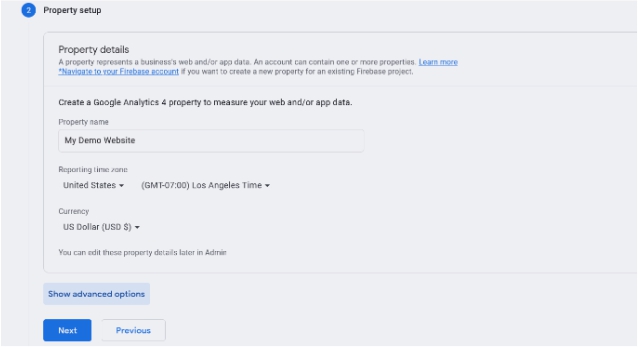
Step 3: You must establish a Google Analytics property on the following screen.
Google released Google Analytics 4, or GA4, a new version of the software. The most recent version records both your website and your mobile apps under one account. Also, you get additional metrics, features, and a new report interface.
Important Information: If you already have an account with Universal Analytics, you must begin tracking data in Google Analytics 4 (GA4) as well. This is due to Google’s July 1, 2023, expiry date for Universal Analytics. Universal Analytics will stop receiving data after the expiry date and finally stop functioning.
After the sunset date, setting up a Google Analytics 4 property will need to start over. But, you may continue utilizing Universal Analytics and send data into GA4 right away. In this manner, when Universal Analytics shuts down, you’ll have historical data in Google Analytics 4 for comparison and analysis.
Enter the name of the property, the reporting time zone, and the currency to get started. Next, press the “Next” button.
You must choose a “Industry category” for your website from the drop-down menu and a “Organization size” from the available options on the following screen.
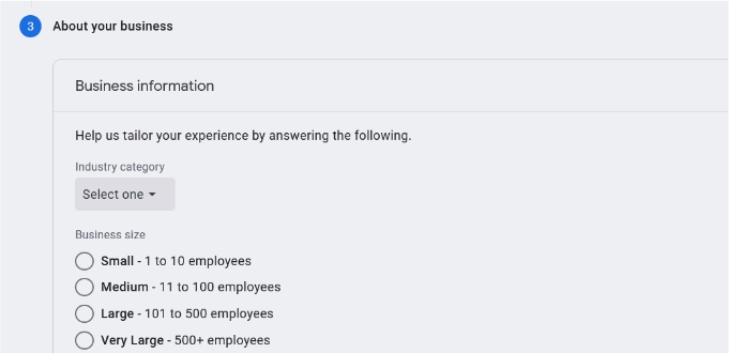
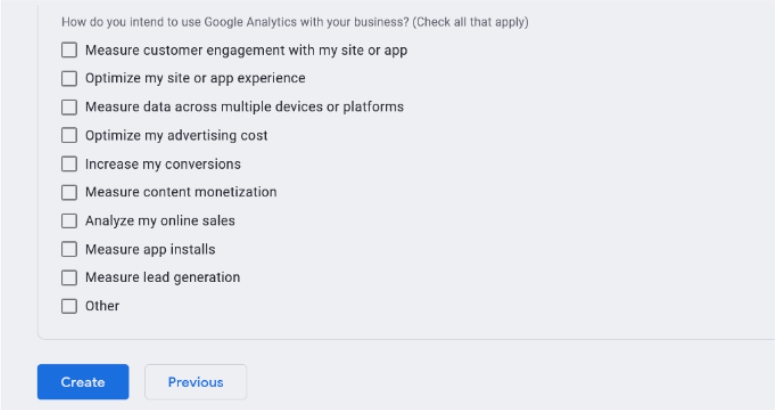
The next step is to scroll down and choose how you want to utilize Google Analytics for your organization, such as to measure engagement, optimize advertising costs, boost conversions, and other things.
You can pick a few alternatives or all of the available ones depending on what you require. Simply click the “Create” button when you are done.
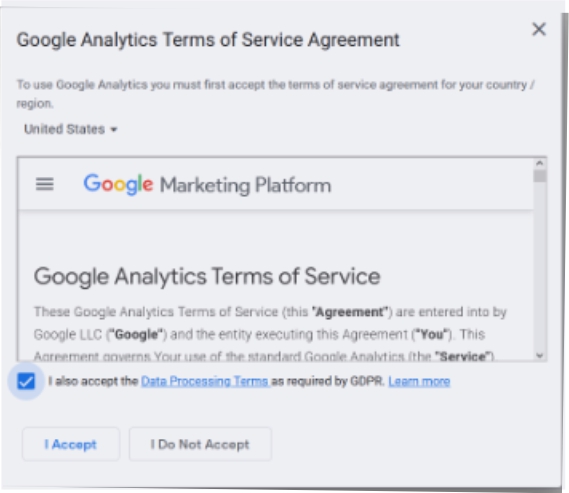
The Google Analytics terms of service agreement will display up once you click the Create button.
Simply choose “I also accept the Data Processing Terms as required by GDPR” from the drop-down menu before clicking the “I Accept” button.
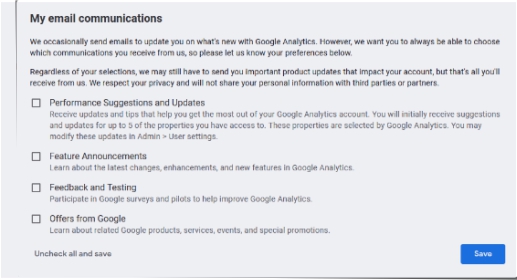
You’ll then get a popup with options for the Google Analytics communication emails you’d like to receive.
Simply select the updates you want to receive by checking the appropriate boxes, and then click the “Save” button.
Also Read: 18 Best Affiliate Plugin For WordPress
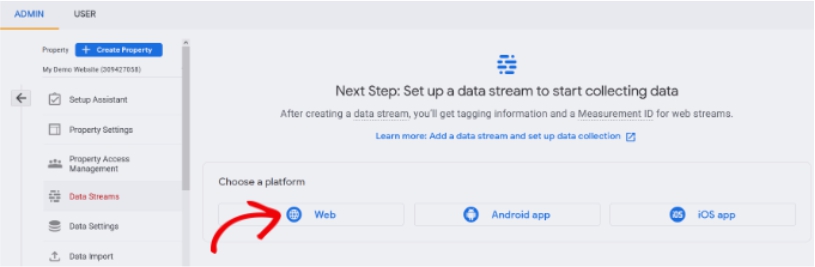
Step 4: Your options for the Google Analytics Webs stream will now be displayed.
Go ahead and choose “Web” as the platform since we are configuring Google Analytics for a WordPress website.
You will then need to provide the URL and name of your stream.
An enhanced measurement option will be turned on by default in Google Analytics. With Google Analytics, you can now monitor things like page views, scrolls, outbound clicks, file downloads, and more.
You can then select the “Create stream” button.

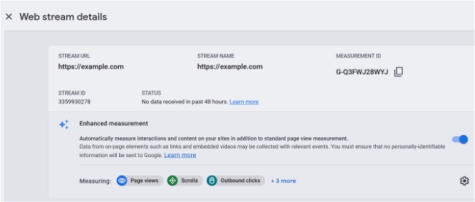
Your Stream URL, name, and Measurement ID are now visible.
Additionally, it will display several improved measurements that it will record.
Under the “Tagging Instructions” section, Google Analytics will also provide examples of how to apply Google Analytics code to your WordPress website.
You may examine the tracking code for Google Analytics by selecting the “Global site tag (gtag.js)” option.
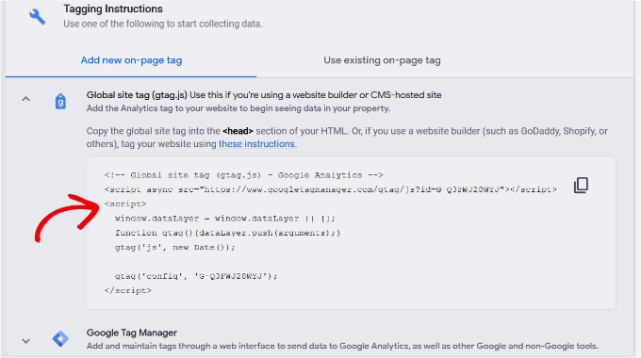
Depending on the technique you employ below, you may need to copy this tracking code and paste it into your WordPress website. You can also simply leave this tab open in your browser and return to it later to copy the necessary code.
After installing the code on your WordPress site, you might need to return to the Analytics browser tab, hence we advise leaving it open.
Let’s look at how to install Google Analytics in WordPress now that you have created a Google Analytics account.
How to Set Up Google Analytics in WordPress
The setup of Google Analytics in WordPress can be done in a few different ways. We will demonstrate only the most straightforward technique.
To avoid double tracking of page visits in your Google Analytics account, you must only use one technique on your website.
Google Analytics for WordPress by MonsterInsights
The most used Google Analytics plugin for WordPress is MonsterInsights. It is used by more than 3 million websites, such as PlayStation, Bloomberg and others.
That is by far the simplest and best method for integrating Google Analytics with WordPress (for all users beginners and experts alike). Additionally, it has a Dual Tracking function that enables you to integrate Google Analytics 4 and Universal Analytics into your WordPress website without having to change any code.
Both a free version and a premium plugin are offered by MonsterInsights. We’ll be utilizing MonsterInsights’ free version for this course.
If you require more sophisticated features like eCommerce tracking, ad tracking, author tracking, etc., you can utilize the MonsterInsights Pro edition. They both require the same setup procedure.
Also Read: How to Increase The Speed of Your WordPress Website
Let’s begin.
Installing and turning on the MonsterInsights plugin is the first thing you should do. See our step-by-step tutorial on installing a WordPress plugin for more information.
After the plugin is activated, a welcome screen and a new menu item with the label “Insights” will be added to your WordPress admin menu. Click the “Launch the Wizard” button now.

The MonsterInsights setup process will launch when you click on it.
Selecting a category for your website will be the first step (a business website, blog, or online store). Click the “Save and Proceed” button after making your choice.

The next step is to link MonsterInsights to your WordPress site.
To connect MonsterInsights, just click the ‘Connect Monsterinsights’ button.

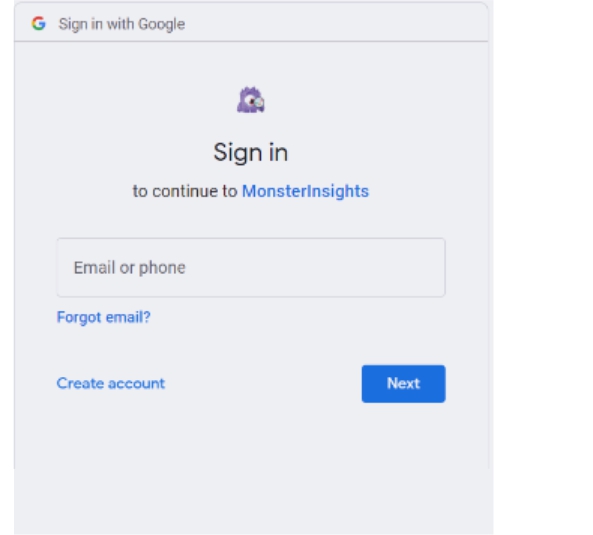
This will direct you to Google Accounts where you will be prompted to sign in or, if you are already signed in, choose a Google Account.
To sign in, simply select your Google account or enter your email.
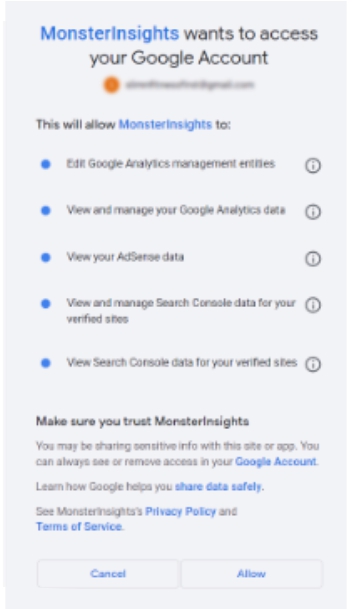
Next, you will be asked to allow MonsterInsights to access your Google Analytics account.
Click on the ‘Allow’ button to continue.
The next step to completing the connection is to select the profile you want to track.
You need to select your website here and then click on the ‘Complete Connection’ button to continue.
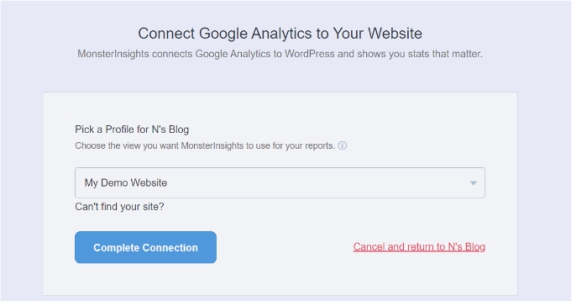
To proceed, simply press the ‘Complete Connection’ button after that. Google Analytics will now be installed on your website by MonsterInsights.
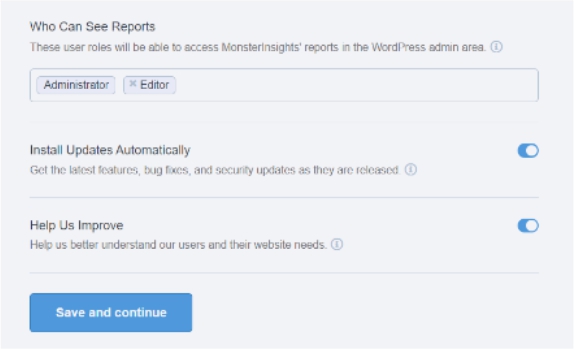
The recommended setting for your website will then be presented to you for selection.
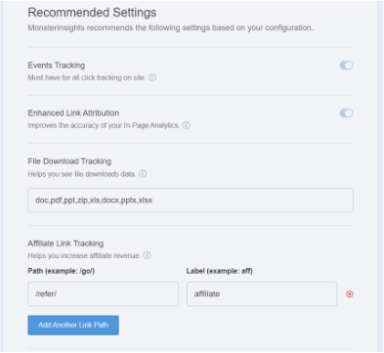
Most websites would function with the default settings. You must specify the path you use to hide affiliate links if you use an affiliate link plugin. You can then use Google Analytics to track your affiliate links.
Also, MonsterInsights will inquire as to who may view the reports. You can select from a variety of WordPress user roles. Once you’re finished, save your settings by clicking the ‘Save and Continue’ button.
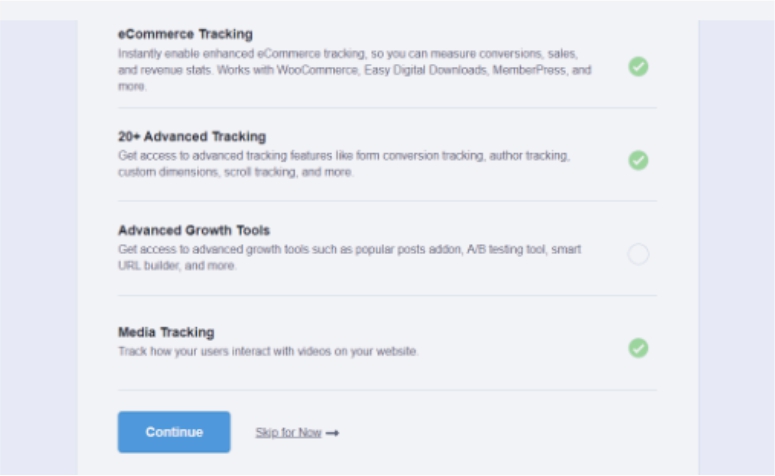
Next, MonsterInsights will show you a list of website tracking features you would like to enable.
You can scroll down and click on the ‘Continue’ button or the ‘Skip for Now’ option.
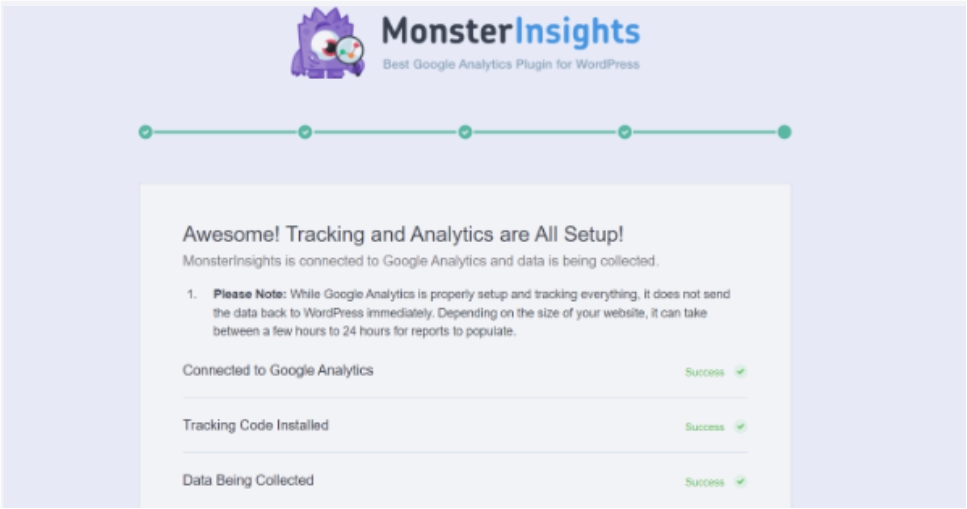
MonsterInsights will display that you’ve successfully setup Google Analytics tracking on the following screen.
You can see that Google Analytics is linked, that tracking code has been set up, and that information is now being gathered.
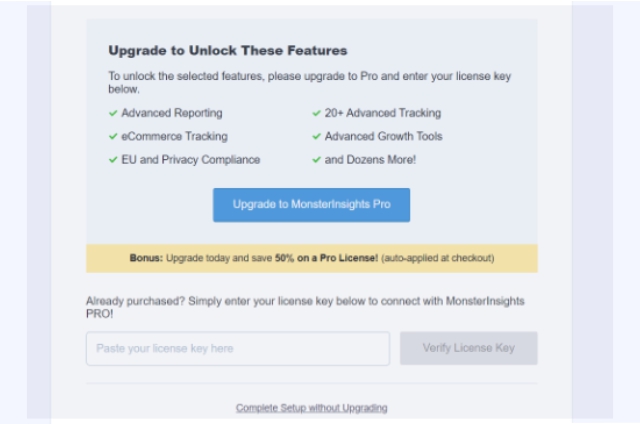
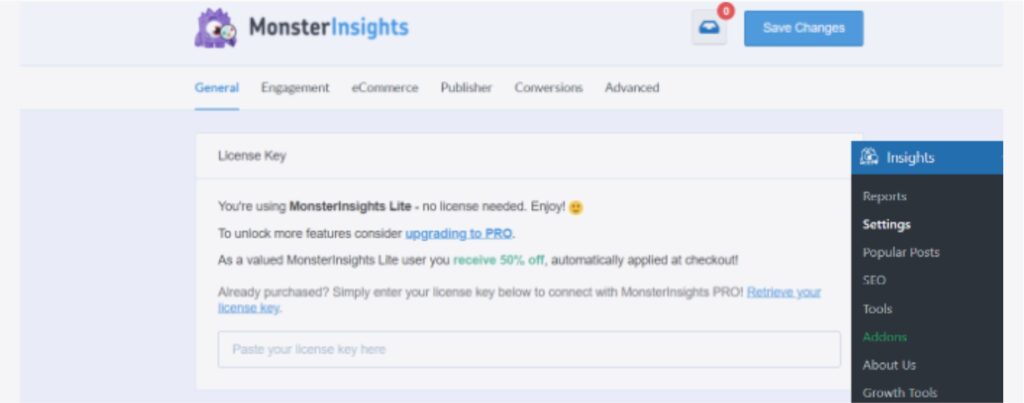
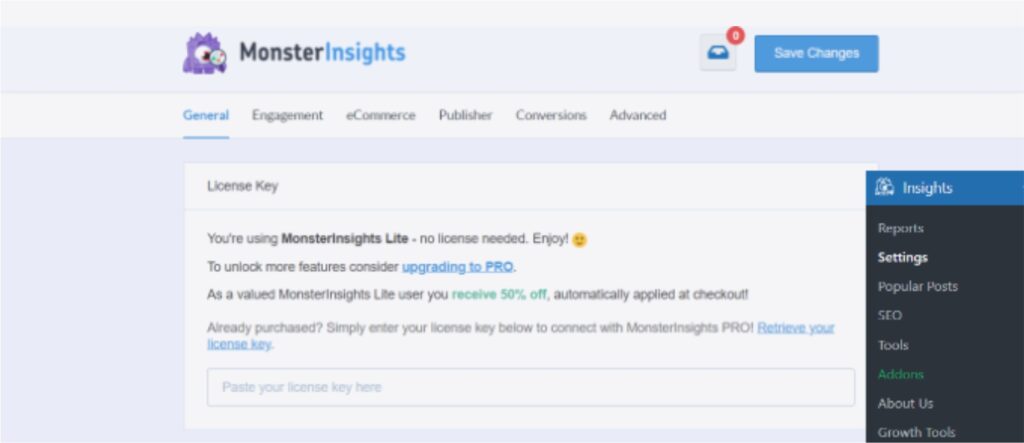
You can then scroll down to a section where you can insert your license key.
For the time being, select “Finish Setup without Updating”.
Google Analytics has been successfully connected to your WordPress website.
The Measure Protocol API Secret must be made next. As a result, MonsterInsights will be able to monitor various occurrences, including form conversions and eCommerce sales.
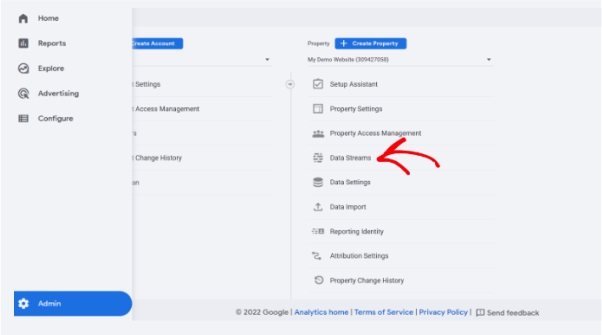
You can log in to your Google Analytics account to get started. Once there, select “Data Streams” from the menu on the “Admin” settings page.
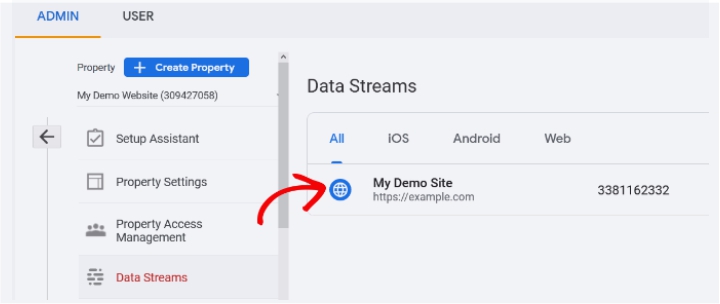
You will then see your Data Streams.
Simply choose the data stream to which MonsterInsights was connected.
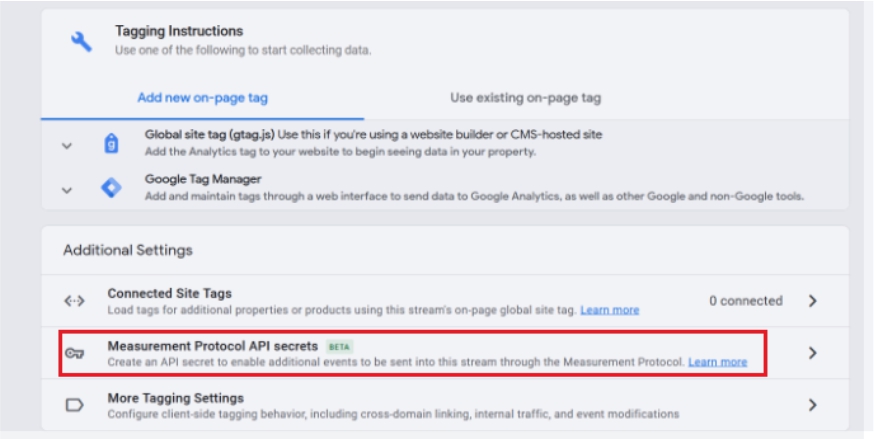
Scroll down to the “Advanced Settings” section on the following screen.
Then select ‘Measure Protocol API Secrets’ from the menu.
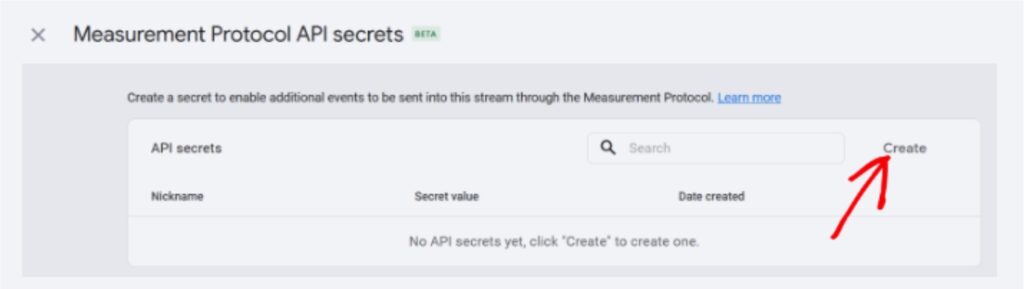
Your Measurement Protocol API Secrets will now appear in a new window that will slide in. This page will be blank at first, and you won’t have access to any API secrets.
Simply click the “Create” button.
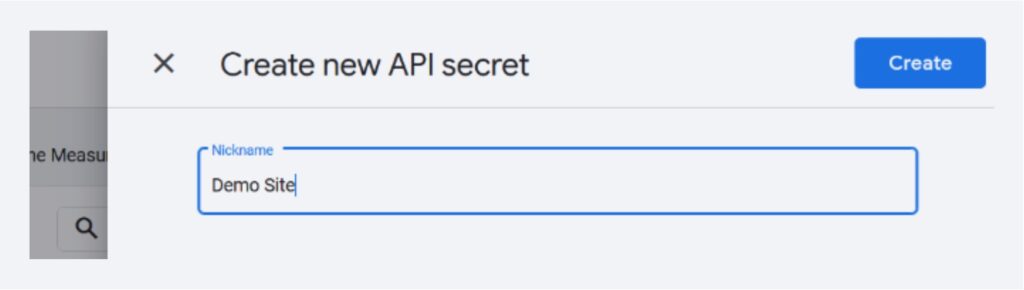
You’ll then need to give your API secret a nickname.
Once you’ve finished, just press the “Create” button.
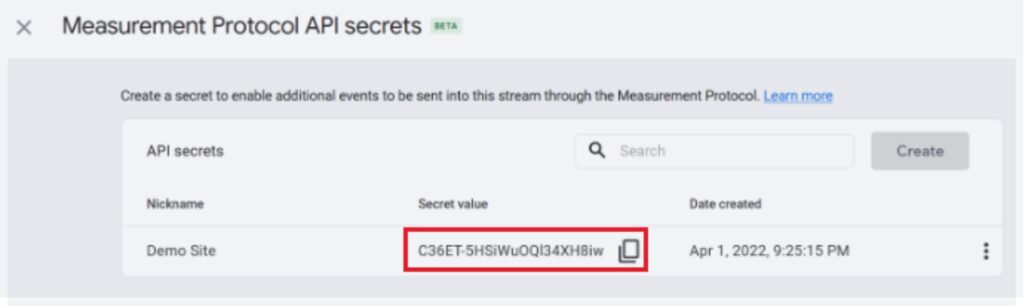
Now, your API secret will be generated.
Copy the API secret that is under the “Secret Value” field.
After that, you must enter the Secret Value in MonsterInsights.
From your WordPress admin panel, go to Insights » Settings, and then pick the ‘General’ option.
Proceed to the section called “Google Authentication” next.
Just fill out the “Measurement Protocol API Secret” column with the Secret Value.
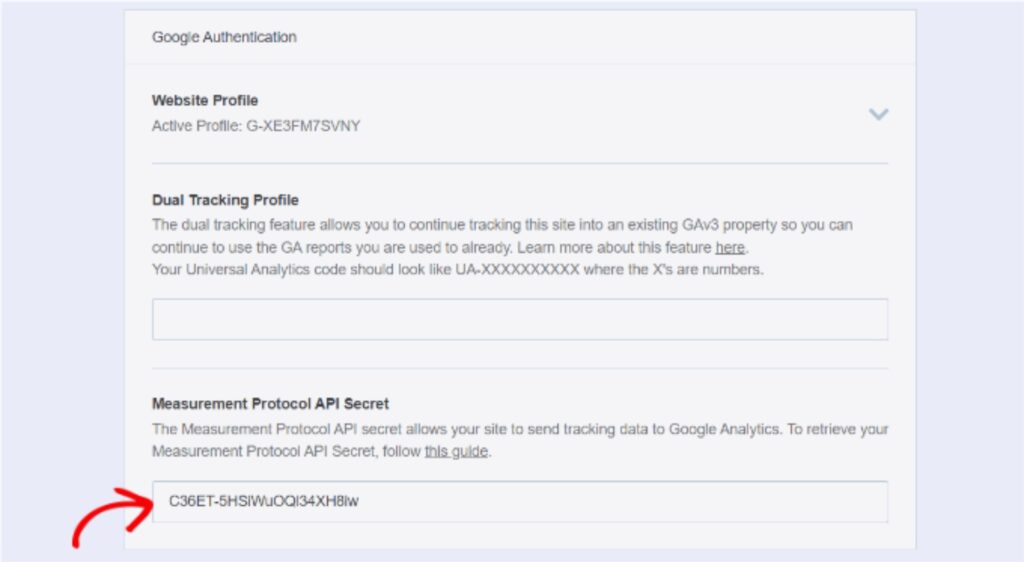
The Measurement Protocol API Secret has been correctly configured.
Now that we know you have a Universal Analytics account, let’s look at how to use dual tracking in MonsterInsights.
How to Set Up Dual Tracking, when using universal analytics
If you already have a Universal Analytics account, MonsterInsights’ Dual Tracking functionality makes it incredibly simple to track Universal Analytics and Google Analytics 4 at the same time. The great aspect is that no code needs to be edited.
Just keep in mind that Universal Analytics will stop working on July 1, 2023, after which time you won’t be able to track the data from your website. We strongly advise you create a Google Analytics 4 property right away and begin submitting data to GA4.
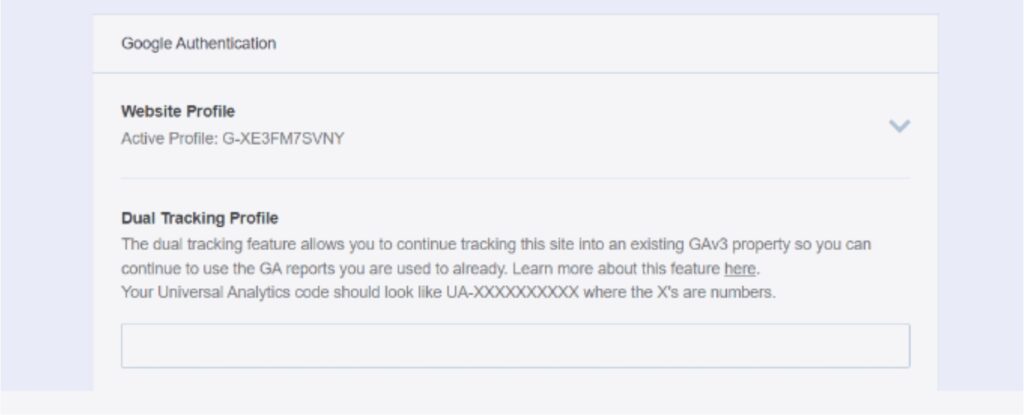
You can start by navigating to Insights » Settings from your WordPress dashboard and clicking the ‘General’ tab to set up dual tracking.
Go down to the “Google Authentication” area after that.
Enter the Universal Analytics (UA) code in the “Dual Tracking Profile” field.
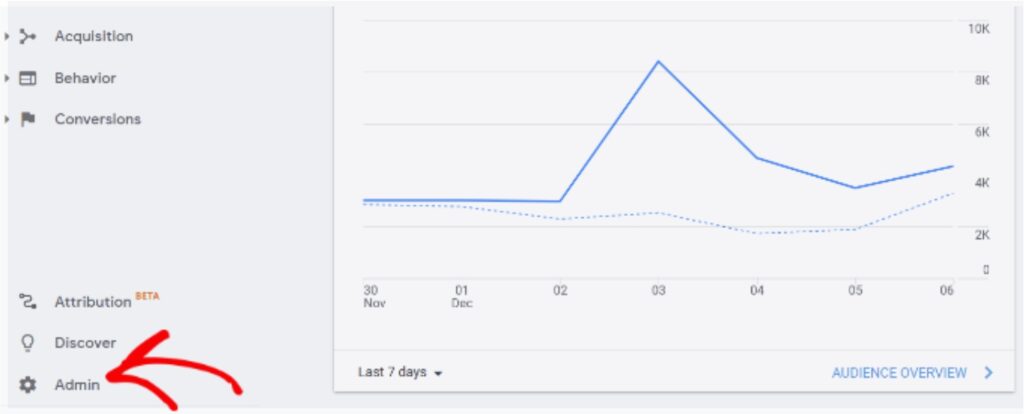
By checking the ‘Admin’ settings page in Google Analytics, you can obtain the Universal Analytics code.
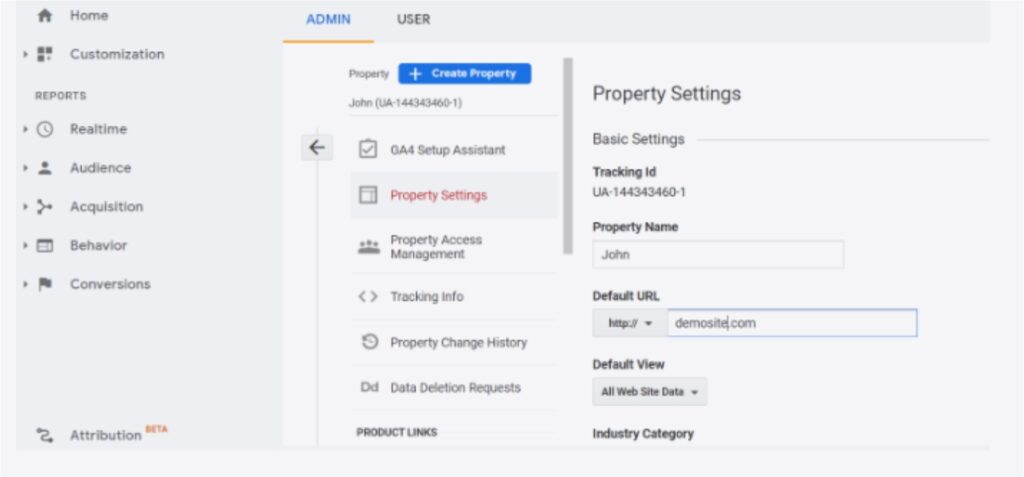
Then, select “Property Settings” from the Property column.
The ‘Tracking Id’ is displayed to you in the following format: UA-123456789-1.
With Google Analytics 4, you can now track Universal Analytics on your WordPress website. Keep in mind that Google Analytics will take some time to display your statistics.
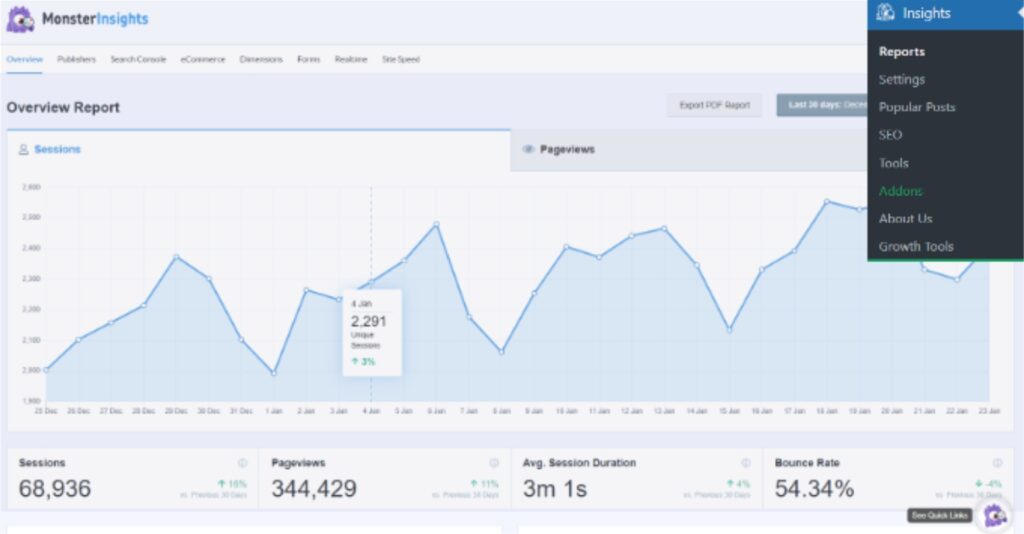
The fact that you can access your Google Analytics reports inside of your WordPress dashboard is the best feature of MonsterInsights. To obtain a brief summary of your analytics data, you go to the Insights » Reports page.
Also, it has a Popular Posts add-on that enables you to display your best-performing articles to increase traffic and pageviews.
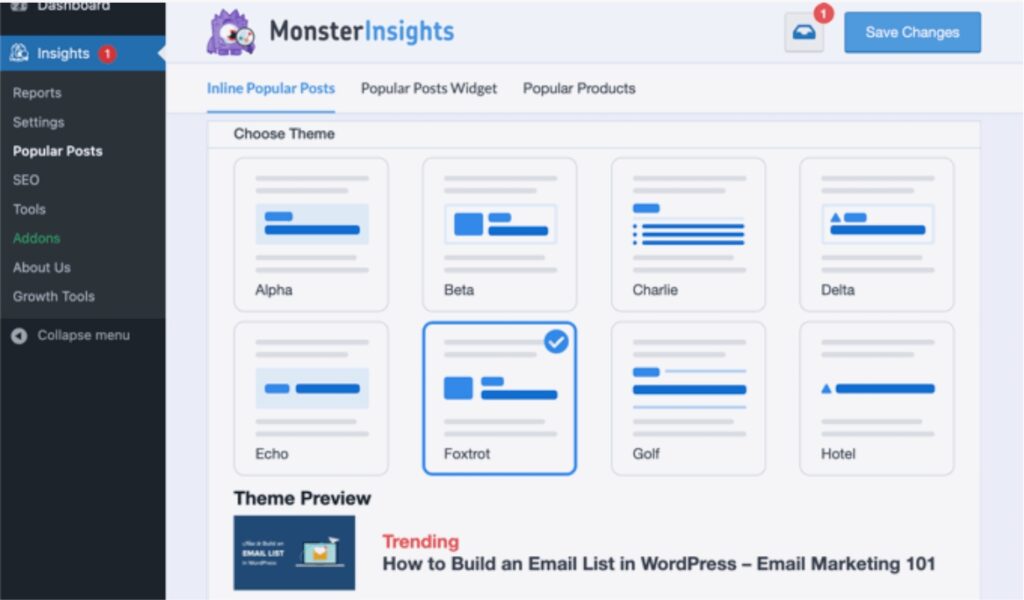
To increase interaction, you can use it to automatically include links to popular posts within your text.
To increase sales, an online store that you use can also automatically include your best-selling items to the end of each blog post:

Checking out reports on the Google Analytics website
Google Analytics is able to provide a wealth of information gathered from your analytics. By entering your Google Analytics dashboard, you can see this information.
See Reports in Universal Analytics
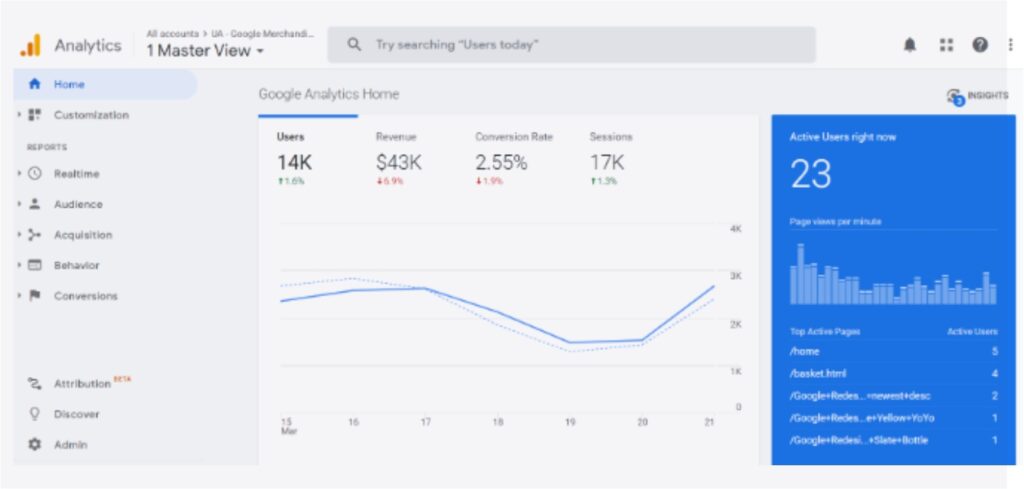
The built-in Google Analytics reports are displayed in the left column. Each section has several tabs that can be expanded to reveal more options by clicking on them.
What various reports in Universal Analytics tell you are as follows:
- You can see your traffic in real time with a real-time report.
- The reports in the Audience tab will help you better understand your users.
- The origins of your users are examined in acquisition reports.
- Reports on user behaviour describe what visitors do once they reach your website.
- Conversion reports demonstrate your progress toward your objectives.
See Reports in Google Analytics 4
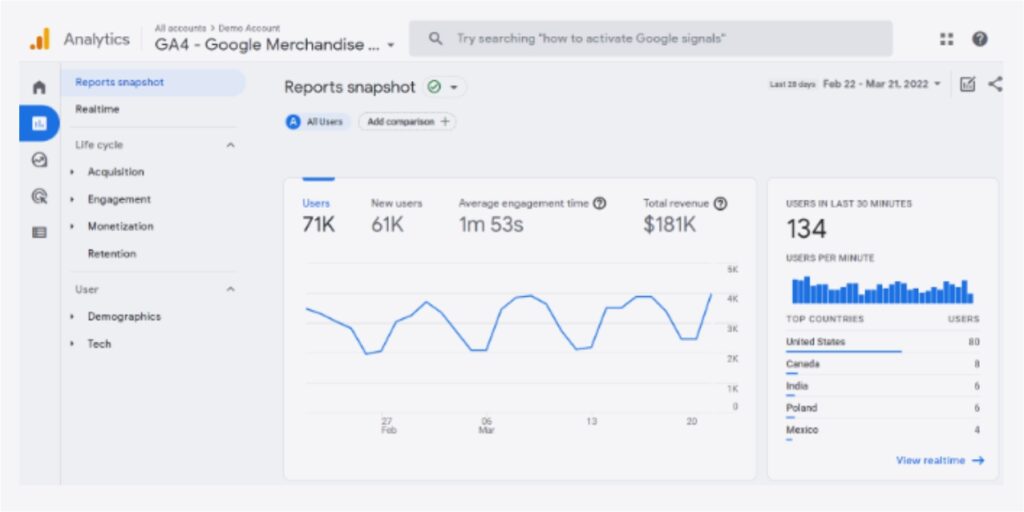
Reports from Google Analytics 4 differ slightly from results from Universal Analytics. You may access Reports using the dedicated option in the left column. Life Cycle and User are two major categories under which the reports are grouped.
There is no bounce rate number in GA4 reports, which is one of the most obvious discrepancies. A new reporting interface, new metrics including engagement time, the absence of targets in GA4, and more can be found in addition to that.
Also Read: How to install a WordPress theme
Also Read: 18 Best Affiliate Plugin For WordPress
Considering that Universal Analytics is no longer being developed and will be phased out in July 2023, you may anticipate additional new features, reports, and metrics to be added to Google Analytics 4 in the near future.
The various reports available in Google Analytics 4 are listed below:
- The real-time report, which displays active viewers on your site in real-time, is comparable to Universal Analytics.
- The acquisition report reveals the search engines that users used to locate your websites, including organic, affiliate, referral, and email.
- The engagement report displays conversions and other site-related activities.
- All of your eCommerce data is collected in one location by the monetization report, which also includes fresh reports on in-app purchases and publisher ads.
- The retention report essentially contrasts new and returning visitors to provide information on user retention.
- You may see website traffic by demographics from popular nations, cities, and more. Additionally, it displays interest reports and gender breakdowns.
- The tech report reveals the most popular screen sizes, operating systems, browsers, and devices used to access your website.