Do you intend to categorize user-uploaded media in WordPress?
If your website has multiple authors, you might want to limit each author’s access to their own uploads in the media library. This can assist keep subscriber-only content private and stop an author from mistakenly removing another user’s images.
We’ll explain how to arrange user-uploaded media in WordPress in this blog.
Why Limit Author Access to Media Uploads?
If your WordPress blog has multiple authors, there may be a lot of different images being uploaded. Because of this, it could be challenging for an author to locate the ideal image, or they might accidentally delete or change someone else’s media asset.
This may result in a variety of issues, such as low productivity, a major increase in work for site administrators and editors, and a challenging editorial workflow.
Also, the unrestricted access raises privacy issues. Other authors might see private images in the media library, for instance, if you’re working on a new product or idea before you make a public announcement.
Contributors and subscribers may gain access to premium media files on your WordPress membership site even though they shouldn’t. For instance, if you sell online courses, a contributor may use their media library access to get free access to expensive PDFs and other course materials.
In light of this, let’s examine two techniques on how to limit who can view media uploads inside your WordPress admin area.
Technique 1: Using a plugin to arrange user-uploaded media (Quick and Easy)
Using the Frontier Limit Access plugin is the simplest approach to control who can upload media.
This free plugin determines whether a user has the edit others posts permission, which gives them the ability to edit posts written by other users.
All users who have the site admin or editor status are given access to this feature by def. You can modify this by adding or removing capabilities from user roles in WordPress.
If the user doesn’t have this permission, they won’t be able to view another user’s files in the WordPress media library once this plugin is activated. Without limiting access for administrators and editors, this enables you to organize user-uploaded media.
You can easily install and activate the Frontier Limit Access plugin because it is ready to use right out of the box and requires no configuration on your part.
Technique 2: Using Code to Manage Media Uploads (Advanced)
Using code to limit access to media library files is an additional choice. This method isn’t the most beginner-friendly because it calls for adding a code snippet to your WordPress blog or website. So you won’t have to set up a special plugin to manage your media uploads.
You may frequently find instructions in guides on how to add custom code to your WordPress theme. This is not advised, though, as coding errors and typos might completely break your website or result in common WordPress issues.
We suggest WPCode for this reason.
Almost a million WordPress websites utilize WPCode, the best code snippets plugin. It makes it simple to implement custom code without having to change the functions.php file in WordPress.
We’re going to add some code in this technique to see if the user has the ability to edit other people’s posts. The code snippet below will prevent users from viewing other users’ files in the WordPress media library if they don’t have this permission.
Installation and activation of the free WPCode plugin are what you should do first.
Go to Code Snippets » Add Snippet as soon as it’s activated.
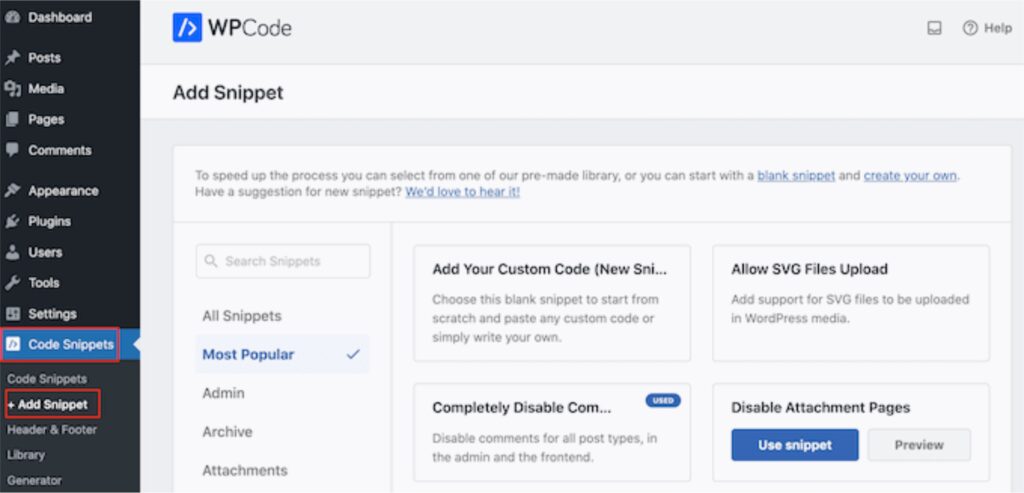
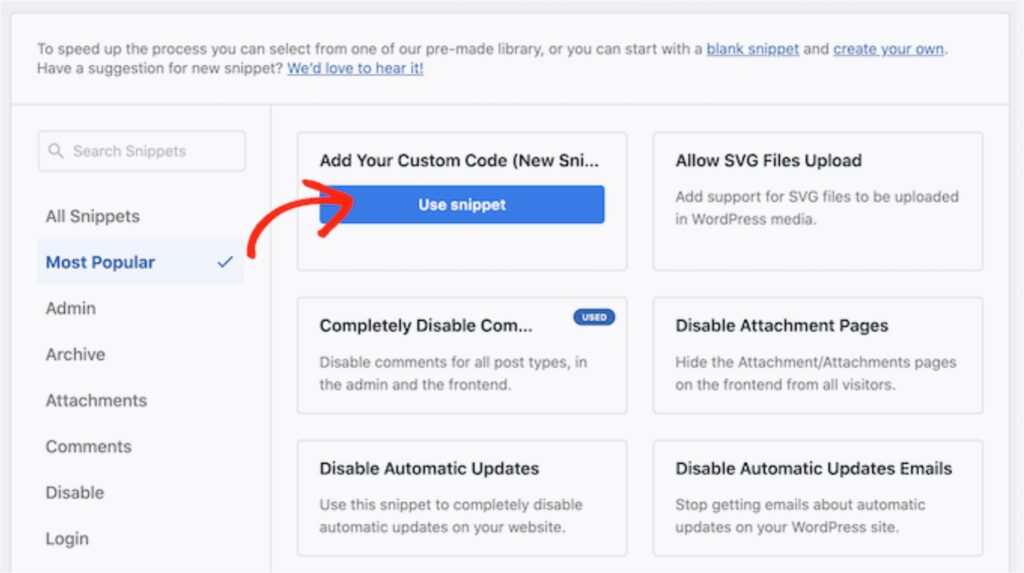
Simply place your mouse over “Add Your Custom Code” to get started.
Once it does, select “Use snippet.”
Provide a title for the customized code snippet to get started. Anything that help in locating the snippet on the WordPress dashboard qualifies as this.
Then, choose “PHP Snippet” from the “Code Type” dropdown menu after opening it.
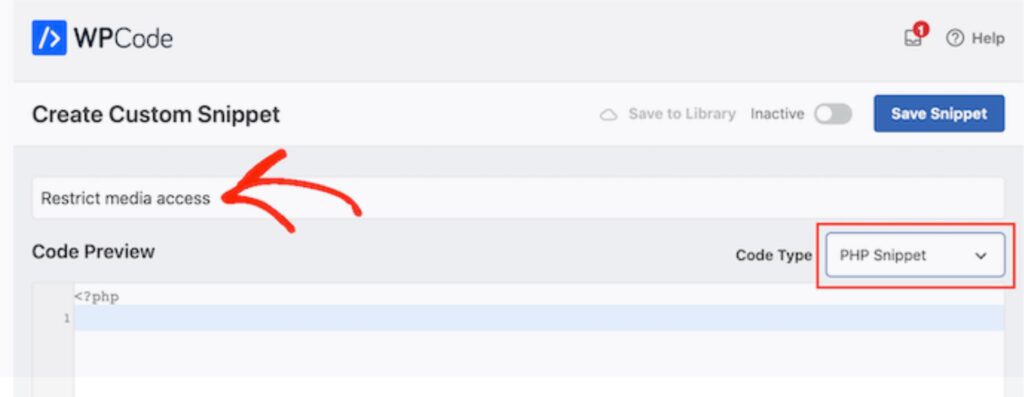
Copy and paste the following code snippet into the “Code Preview” area:
add_filter( 'ajax_query_attachments_args', 'user_show_attachments' );

function user_show_attachments( $query ) {
    $user_id = get_current_user_id();
    if ( $user_id && !current_user_can('activate_plugins') && !current_user_can('edit_others_posts
') ) {
        $query['author'] = $user_id;
    }
    return $query;
}
Then simply scroll down to the “Insertion” section. Your code can be added via WPCode in a variety of places, including the admin area, the frontend alone, or the end of each post.
Click on “Auto Insert” if it isn’t already chosen because we want to use the customized PHP code throughout our complete WordPress website. Then, select “Run Everywhere” from the “Place” dropdown option.

You can then navigate to the top of the screen and select the “Inactive” toggle to make it “Active.”
To make the PHP snippet live, click the “Save Snippet” button

Only the files that users upload to the WordPress media library will now be available to them.
.’